 Hello, There!
Lately, I’ve been on a mission - testing multiple environments to deploy and use ODK Central. Be it an Android device, a Raspberry Pi, or some other setup, I’ve experimented with many. But in this topic, we’ll focus on deploying ODK Central locally, making it accessible worldwide - without a static IP, for free, and with all the essential functionalities intact.
Once we wrap this up, I’ll also leave you with some hints on how to achieve the same on a Raspberry Pi or even an Android device.
Note: we won’t be setting up a development environment here; instead, we’ll be using ODK Central’s production setup (the one that runs on Docker) to get everything working. Excited? Let’s dive in!
 Caution!
While this setup is fully functional and good for data collection, I do not recommend using it in a production environment. Gasp! But why? Well, let’s be real - do you really want to stake your critical data on an experimental setup? Who knows what unexpected surprises (ahem, disasters) might come knocking? It’s always better to be safe than sorry.
If your work is mission-critical, I strongly advise following the official documentation and opting for a more reliable approach - whether that’s GetODK Cloud or self-hosting on a reputable cloud provider. Don't blame me if you find yourself debugging your local setup at 3 AM on a Sunday night! ![]()
That said, if you’re here for development, testing, or just some geeky experimentation - then by all means, proceed!
 Motivation!
There are countless posts on the Forum where people attempt to deploy ODK Central locally, only to hit a roadblock. Some of the usual suspects?
- “Why can’t I deploy ODK Central on an IP? Why do I need a domain name?”
- “Enketo isn’t working in my local deployment!”
- “I can’t connect ODK Collect to my local deployment!”
And the list goes on…
So, I figured - why not create a straightforward guide that walks you through the process while ensuring you get the full experience of ODK Central before moving to a cloud setup? I believe that's reasonable enough?
 Procedure..
Step 1: Setting Up a Linux Environment
Since I’m on Windows OS, instead of deploying ODK Central directly on Windows, I’ll be using WSL (Windows Subsystem for Linux) to create a lightweight virtual environment (Debian). You may also use Ubuntu Server over VirtualBox, VMWare, Hyper-V Manager, UTM (if on Mac, maybe?), or any Linux distro as your main boot-able OS, anything given your system's configuration and requirements.

Notes:
- Ensure at least 2GB RAM and 25GB disk space for your Linux instance.
- Use x64 architecture (we’ll discuss ARM later).
- Run commands with sudo where necessary.
- Install cURL if it’s not already available.
Step 2: Introducing Tunneling
Let’s talk about tunneling - but I won't be diving into networking based definitions. Imagine you have a service running on localhost, but you wish to expose it to the internet. There are several ways to do this, like port forwarding, but that requires a static IP (This can also be achieved using a dynamic public IP with DuckDNS, but you need to have a accessible public IP then. Many ISPs don’t provide one, as they offer internet connectivity through a subnetted network). Since I don’t have one as well, we’ll use tunneling services instead.
There’s an awesome GitHub repository that lists tunneling services: Awesome Tunneling. Two of the most popular services are Cloudflare Tunnel (Zero Trust, they call it?) and NGROK, but personally? I don’t trust or like either. Instead, we’ll use the open-source option at the top from the list: Telebit (minimal & good for our requirement).
To set up Telebit, just run this one-liner (use sudo) in local Linux instance:
curl https://get.telebit.io/ | bash
It’ll ask for your email - enter it. Then, verify it using a code that appears in the terminal. Once done, Telebit will assign you a funny-looking subdomain (mine was mean-firefox-44.telebit.io).
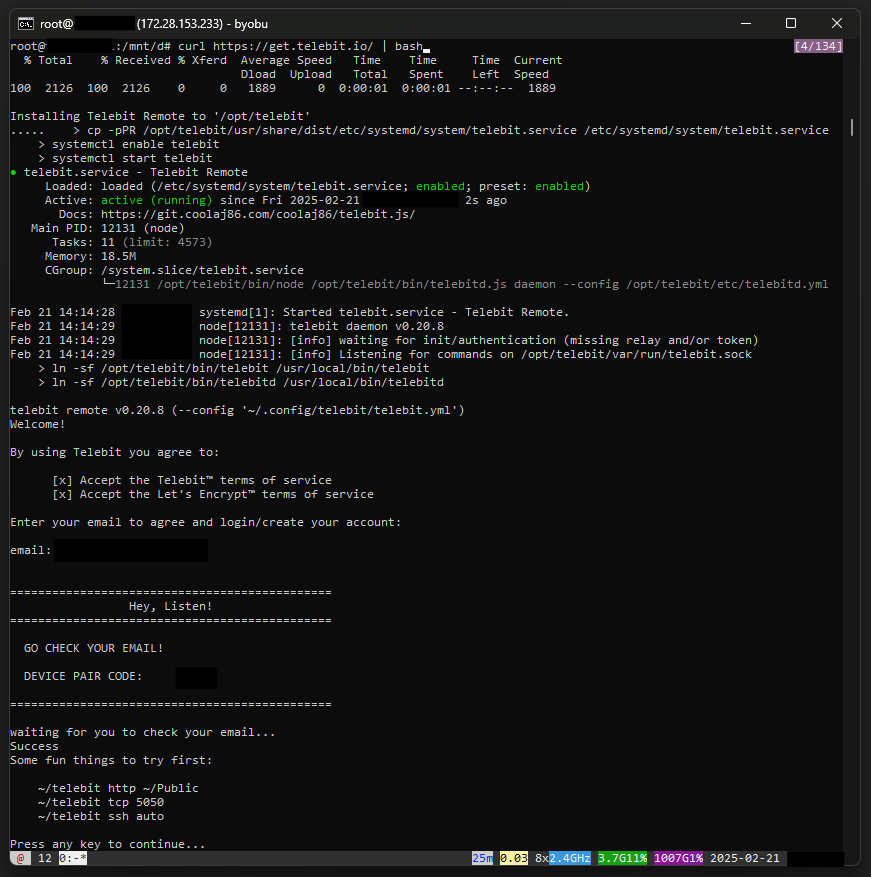
..

Good thing? Telebit automatically handles SSL using Let's Encrypt, so you don’t have to worry about certificates!
At this point, your virtual machine is now accessible via the internet! Congratulations! ![]()
Step 3: Installing Docker & ODK Central
Now, let’s install Docker and ODK Central on our virtual machine. We’ll set up ODK Central behind a reverse proxy. Refer to this guide: Using Upstream SSL in ODK Central. Modify your docker-compose.yml and .env accordingly as per the instructions in the documentation, and in .env, set your Telebit subdomain as the domain name, like:
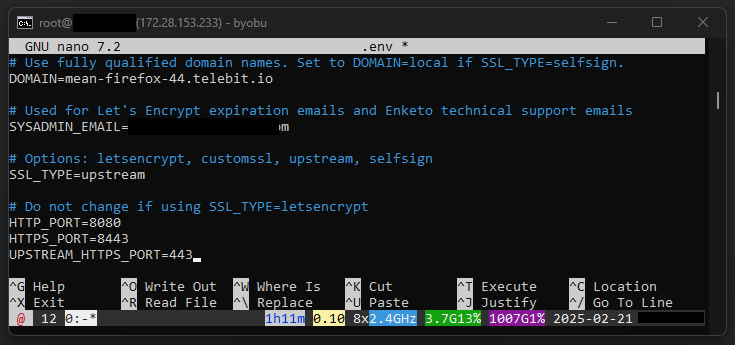
Notes:
- Ensure your firewall isn’t blocking requests.
- You can configure the mail server in .env as well, but I’m skipping it since I prefer setting up accounts via CLI / API.
Step 4: Establishing the Tunnel
Once ODK Central is installed, check the container status:
docker compose ps
If all looks good, run:
~/telebit http 8080
(This will establish a tunnel assuming ODK Central is running on port 8080, as we configured in the .env file)

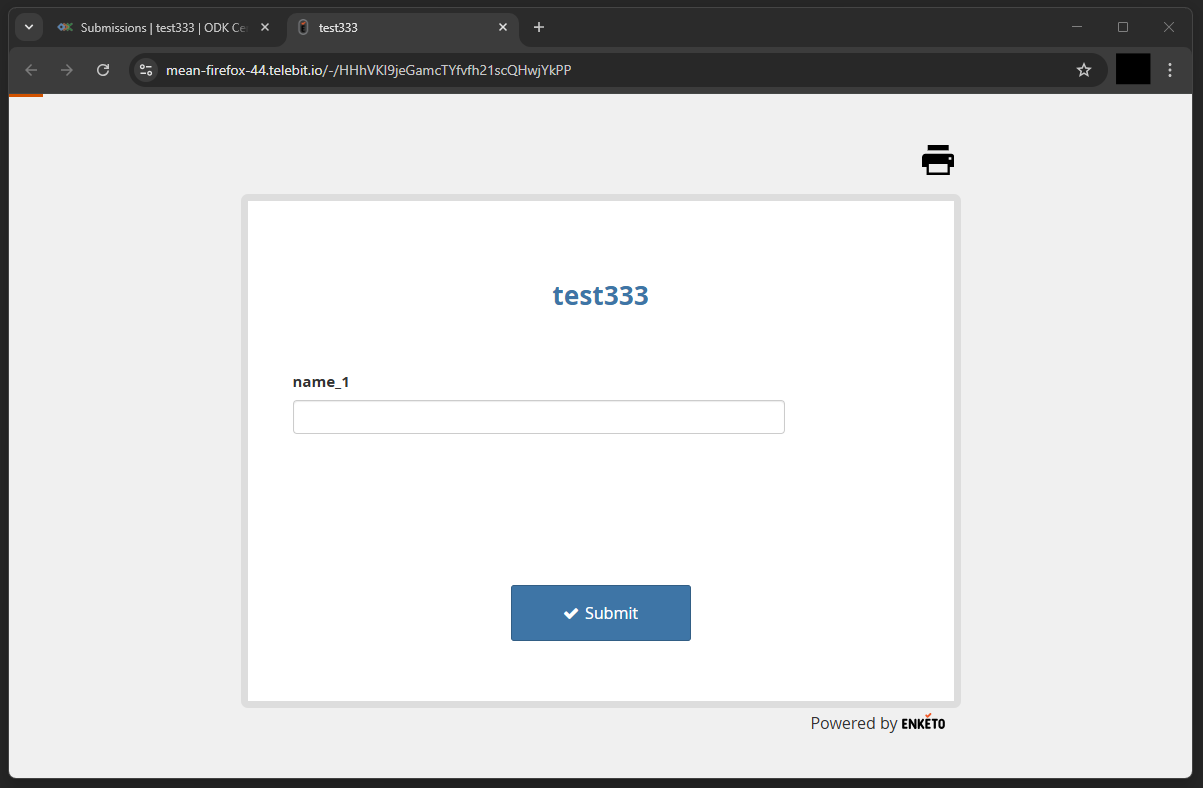
Now, visit your funny looking Telebit subdomain and - BAM! You now have ODK Central hosted locally but accessible worldwide!

Step 5: The Last Step
Finally, setup the admin user and follow this guide to fix Enketo's preview issues: Troubleshooting Preview @ ODK Central. Tip: Add 1.1.1.1 as a fallback DNS as well (not needed, but I like Cloudflare over Google).
Testing Enketo:
 End Note!
We did it! Now, you have a fully functional ODK Central instance deployed locally, yet accessible worldwide - without a static IP. Enketo & ODK Collect? Working perfectly!
 Homework Assignment
- Now, as I promised, here are some hints on deploying ODK Central on an Android device or Raspberry Pi (mostly ARM-based devices): Instead of modifying ODK Central's codebase, use QEMU to emulate x86-64/AMD on ARM architecture. This allows ODK Central to run as is. Will it work? Yes, I’ve tried it before! You can use Termux on Android for execution. However, note that deploying on Android requires a powerful flagship device.
- Telebit assigned us a funny-looking subdomain, but! You can also use your own domain to mask it. I'll leave it to you to figure out how!

That’s all, folks! Wishing you all a great day! ![]()